Have you ever struggled with Excel when column widths are too narrow to display numbers or when inconsistent row heights make your data hard to read?
Manual adjustments are time-consuming, but VBA macros can solve this problem instantly.
This article shows you copy-paste ready VBA code for auto-adjusting column widths and row heights - no programming experience required.
For manual adjustment methods, please refer toHow to Adjust Column Width and Row Height in Excel (Manual Methods Explained).
How to Automatically Adjust Column Width and Row Height in Excel VBA
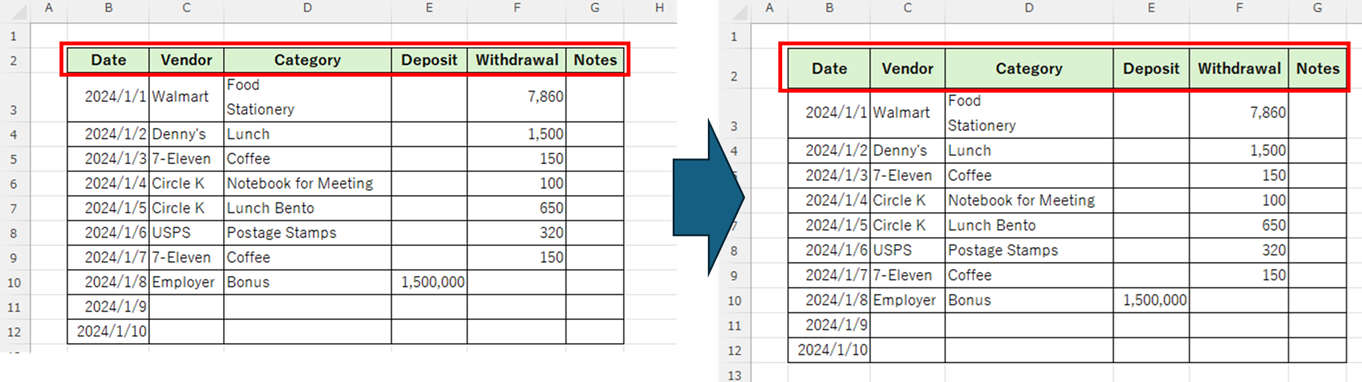
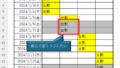
Let's examine a table where improper column widths and row heights affect data readability.
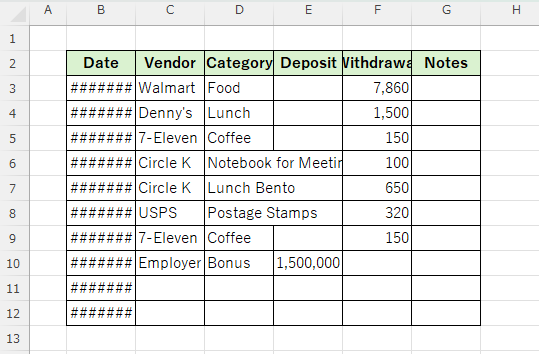
Because the dates in column "B" and the amounts in column "E" are too narrow, they are displayed as "#######" and the dates and amounts cannot be read.
Also, only the front part of column "C" is visible, and the back half is obscured by column "D" and cannot be read. Column "D" does not fit in the text and overlaps with column "E".
Auto-adjust column width
Excel VBA makes it easy to automatically adjust column widths.
First, let’s adjust the width of columns “B to G” to display the cells that are too narrow to see.
To automatically adjust the width, use "EntireColumn.AutoFit".
The example is
Sub width_adjustment()
    Columns("B:G").EntireColumn.AutoFit ' ←Automatically adjust column widths from B to G
End Sub
If you run this
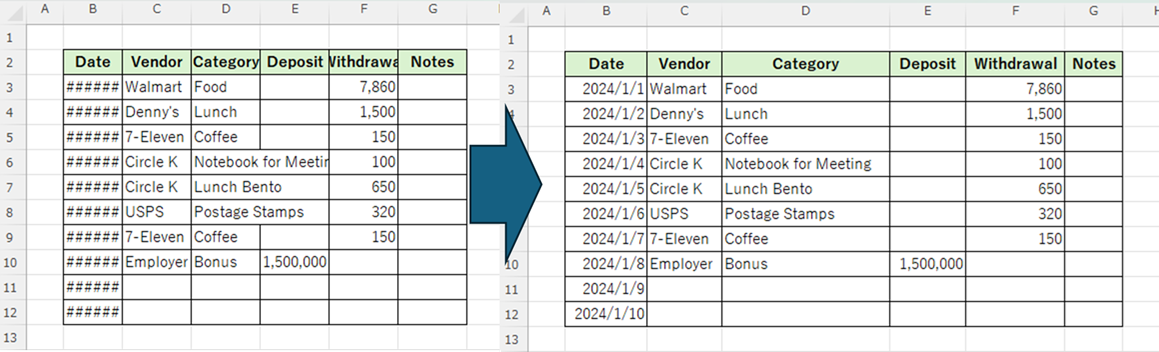
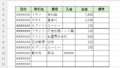
Columns "B~E" have been made wider, making the entered data easier to read.
On the other hand, columns "F" and "G" were too wide with wasted space, so they have been adjusted to a more appropriate size.
Auto-adjust row height
Next, we will adjust the row height of rows 2 to 12.
To automatically adjust the height, use "EntireRow.AutoFit".
The example is
Sub Height_adjustment()
    Rows("2:12").EntireRow.AutoFit   ' ← Auto-adjust row heights from row 2 to 12
End Sub
Let's change all row heights at once using this macro code.
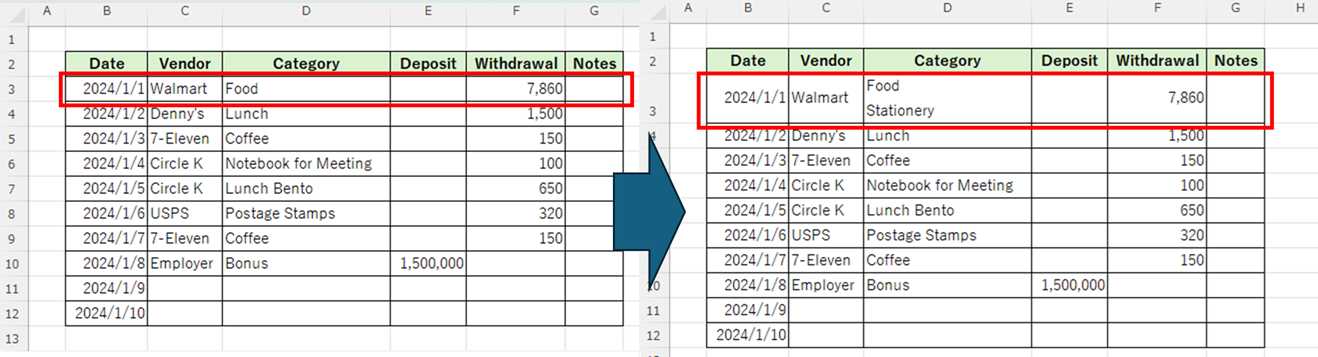
The "third row" has become wider. I didn't notice it at first, but the "D3" cell had a line break, and the word "stationery" was completely hidden. This macro automatically adjusted the height to display all the data.
Resize to any width and height
Change the column width to any size
Column "G" does not contain any data, so its width is set to the width of two characters for "Notes." However, since there is a possibility that multiple characters may be entered in the future, you would like to make it wider.
To specify the width to any size, use ".ColumnWidth = [any number]".
The example is
Sub width_adjustment()
    Columns("G:G").ColumnWidth = 30.05  ' ← Set G column width to 30.05
End Sub
If you run this
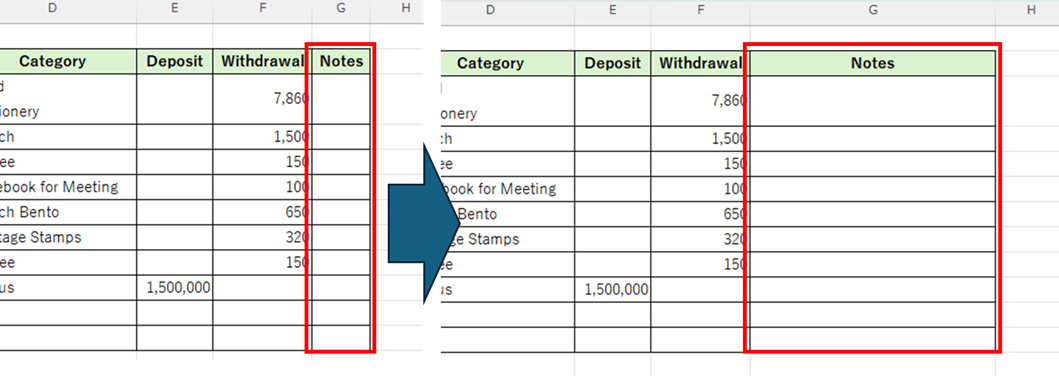
We were able to increase the size of the notes.
You can change it to your preferred size by modifying the "30.05" value to any number you like.
Change the row height to any size
Let's make the title line on the second line a little wider to make it easier to read.
To specify the height to any size, use ".RowHeight = [any number]".
The example is
Sub Height_adjustment()
    Rows("2:2").RowHeight = 30.05   ' ← Set row 2 height to 30.05
End Sub
If you run this
The title line has been made a little wider to make it easier to read.
Summary
This time, we explained how to use macros to automatically adjust or change to any size.
You can also adjust it manually or change it all to the same size. For details, seeHow to Adjust Column Width and Row Height in Excel (Manual Methods Explained).
If you found this article helpful...
Please support by sharing the link or on social media—it really motivates me!
👇One click to copy this page’s URL 👇


Comment