
Have you ever had to worry about writing addresses for New Year's cards or summer greeting cards? Writing dozens of cards by hand is a lot of work, but buying specialized software is also a bit expensive.... Everyone has experienced this dilemma at least once.
But it's actually on your computer.Excel and Wordmakes it surprisingly easy to print professional-looking addresses! You may be thinking, "Really? you may be thinking, "Really? Don't worry. This blog will help you become a master of address printing.
This blog will explain everything from the basics of making an address book in Excel to beautiful printing techniques in Word in an easy-to-understand way for beginners, so even if you are not good with computers, you will be fine!
Once you have mastered this method, you will find it much easier to write your annual address. Not only will you save time, but you will also be able to deliver your feelings to your loved ones with a clean and accurate address. You don't have to worry that your handwriting is not good enough.
Now, let's dive into the world of address printing together. By the time you finish reading this blog, you will be amazed at how easy it was. You will be surprised at how easy it is. We hope you will experience the moment when your annual seasonal greetings become something to look forward to, instead of something to struggle with.
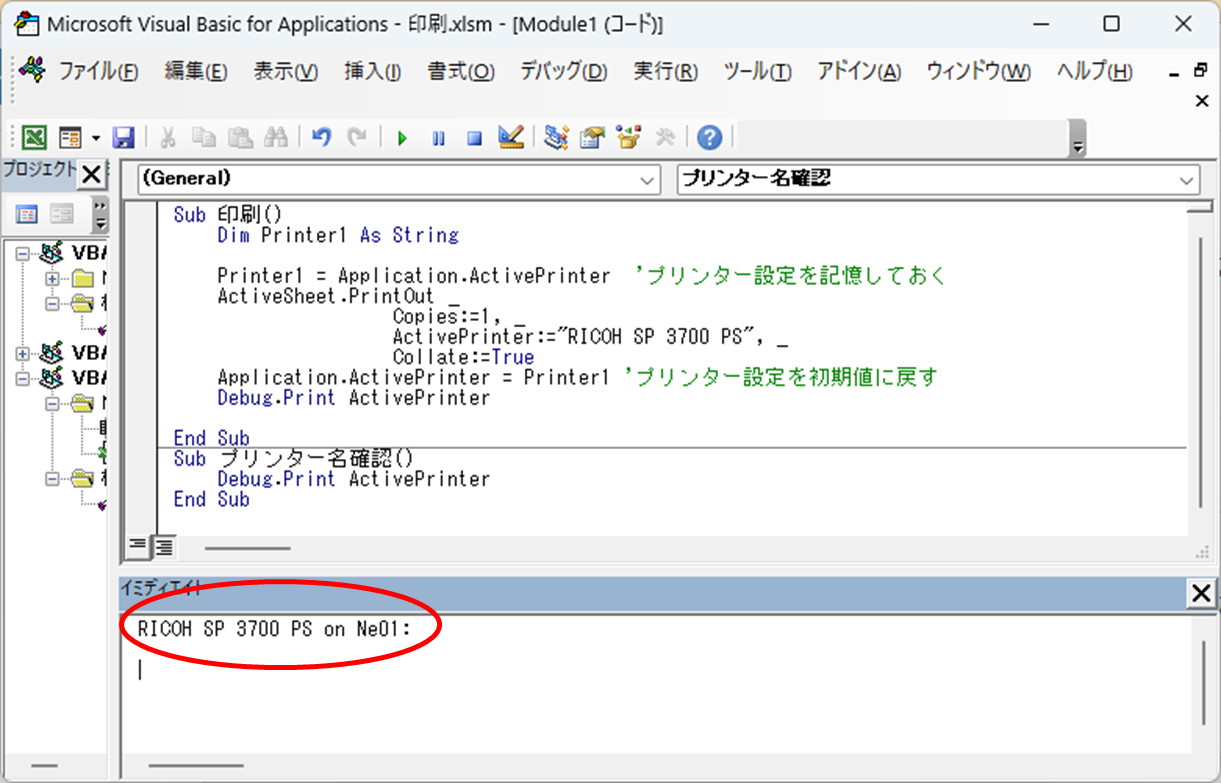
If you have multiple printers, the following explains how to print by specifying a specific printer. Please also read this page. ↓↓↓↓↓↓↓↓↓↓↓↓↓
Create a mailing list in Excel
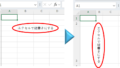
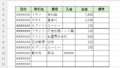
Align arithmetic numbers in the address with Chinese numerals.
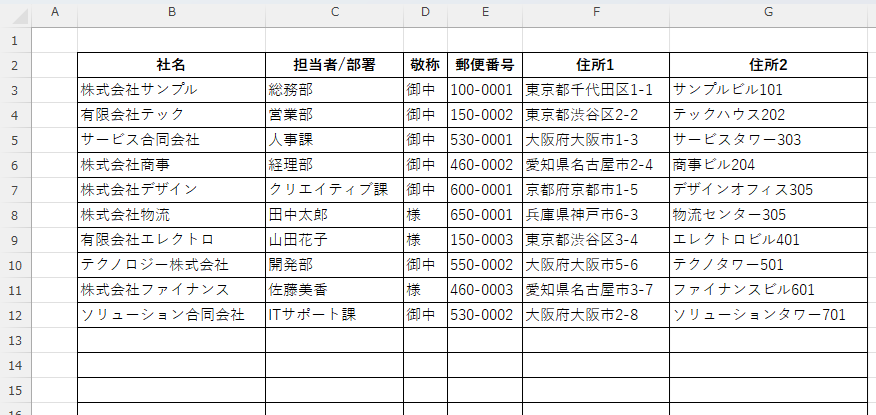
First, prepare a list of recipients using Excel. If you already have a list of names, customer lists, etc., you can use that. There is no need to create a new list.
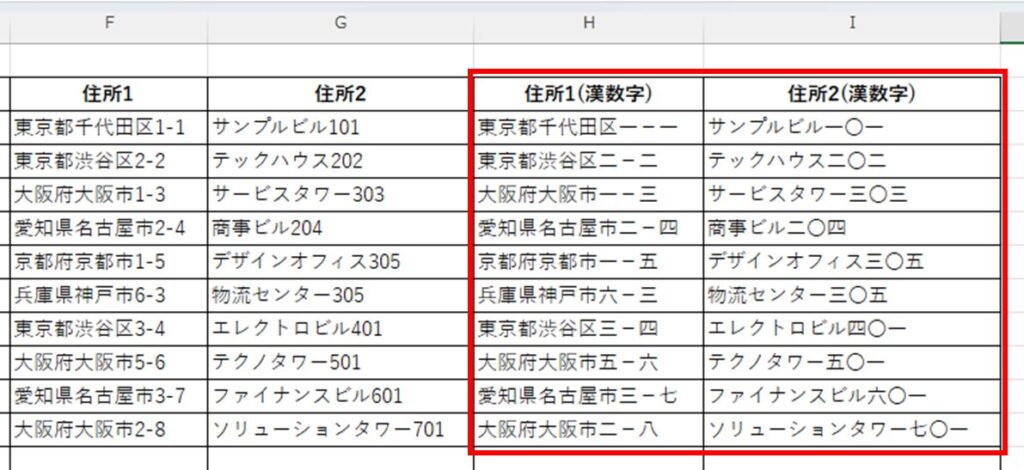
vertical writingIf printing, the numbers areChinese characters which express numbersmust be converted to An easy way to convert is to use the
See this page. ↓↓↓
To conclude the above article, enter the following code in the target cell,blue text (e.g. on a web page)If you put the target cell coordinates in the "*" section, the numbers areChinese characters which express numbersto the "1" in the "1" column.
=SUBSTITUTE(SUBSTITUTE(SUBSTITUTE(SUBSTITUTE(SUBSTITUTE(SUBSTITUTE(SUBSTITUTE(SUBSTITUTE(SUBSTITUTE(SUBSTITUTE(JIS(A1),"1","一"),"2","二"),"3","三"),"4","四"),"5","五"),"6","六"),"7","七"),"8","八"),"9","九"),"0","〇")If it doesn't workAbove articlePlease refer to the following page, which even describes the measures to be taken to
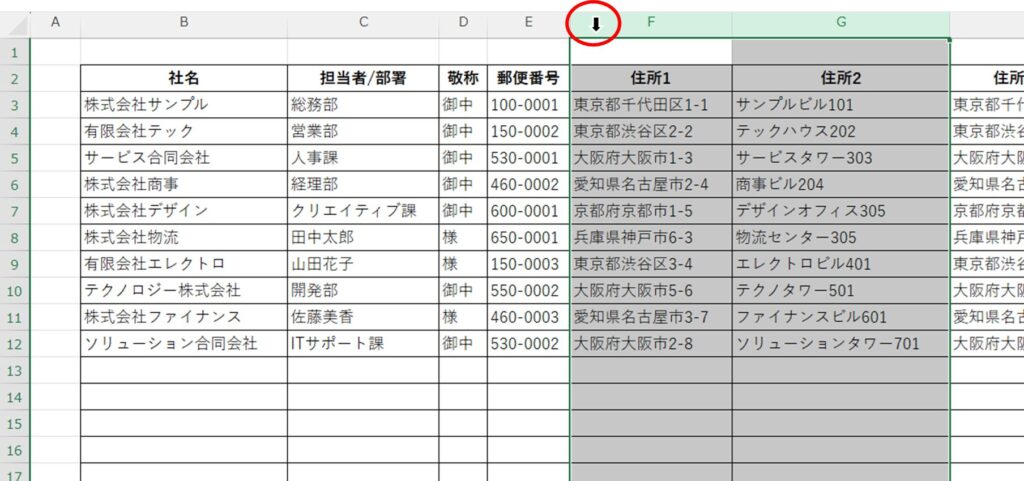
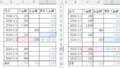
Separate the zip code into the first 3 digits and the last 4 digits.
Select two rows immediately to the right of the ZIP code column and right-click at the column number.
Click "Insert" in the menu that appears.
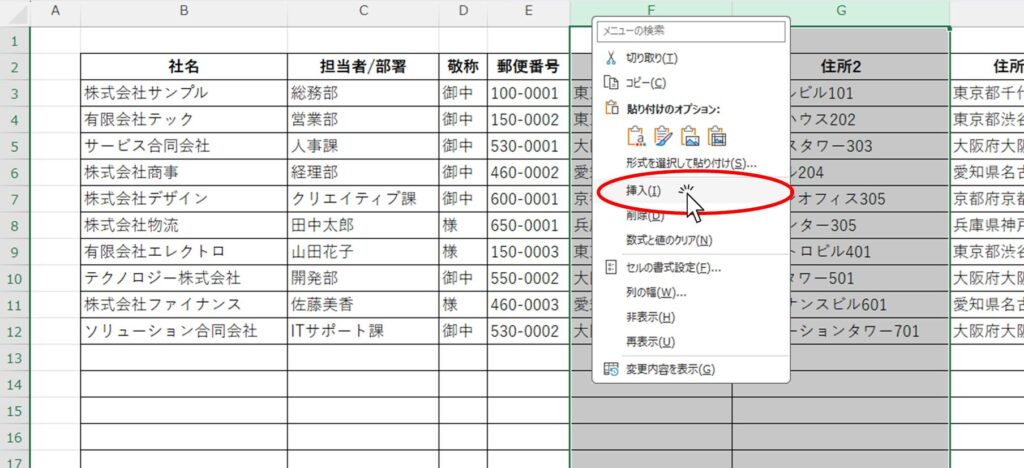
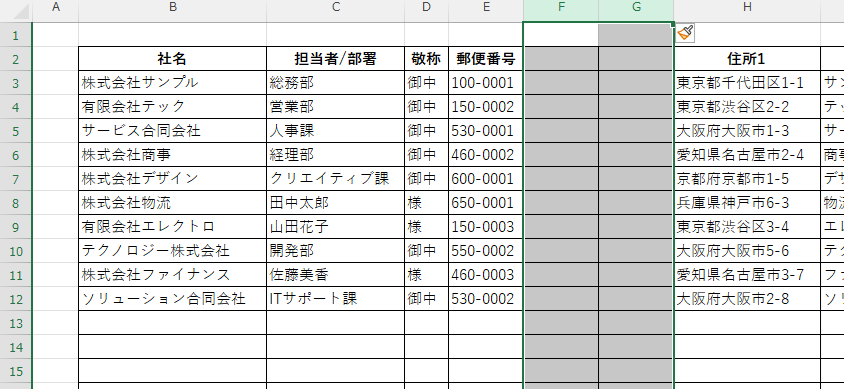
Then two empty rows appear immediately to the right of the zip code row.
Give each a title, and in this example, put the following functions in the "F3" and "G3" cells.
F3" cell
=LEFT(E3,3)G3" cell
=RIGHT(E3,4)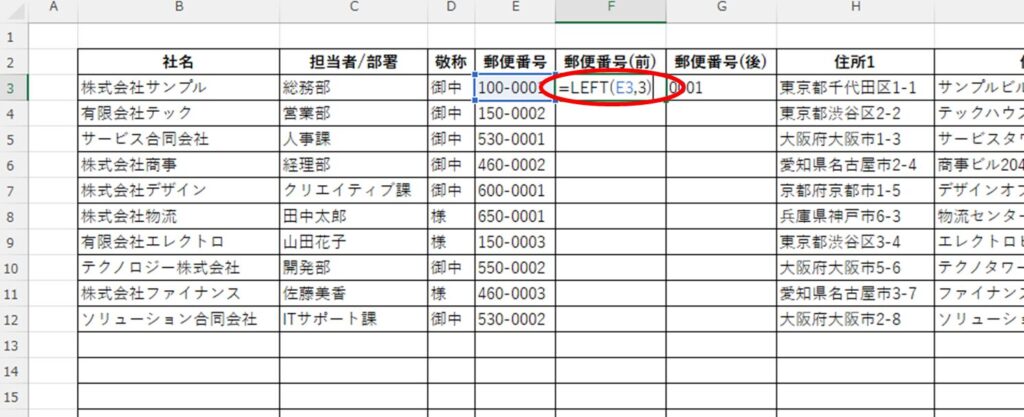
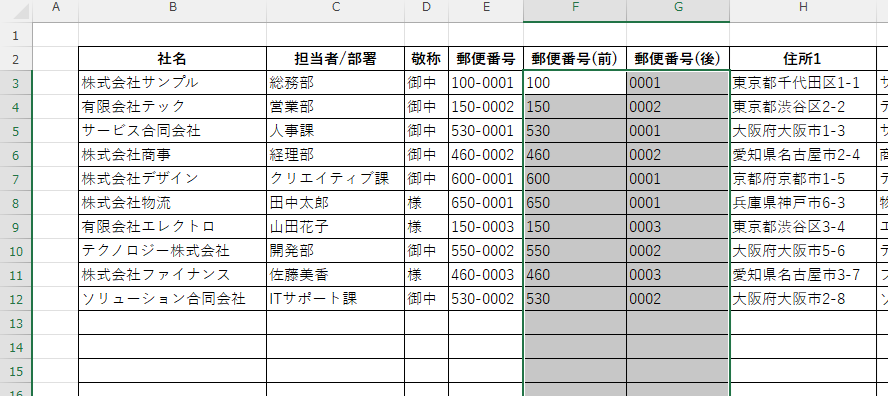
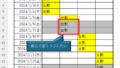
Copy the functions in cells "F3" and "G3" down to the bottom.
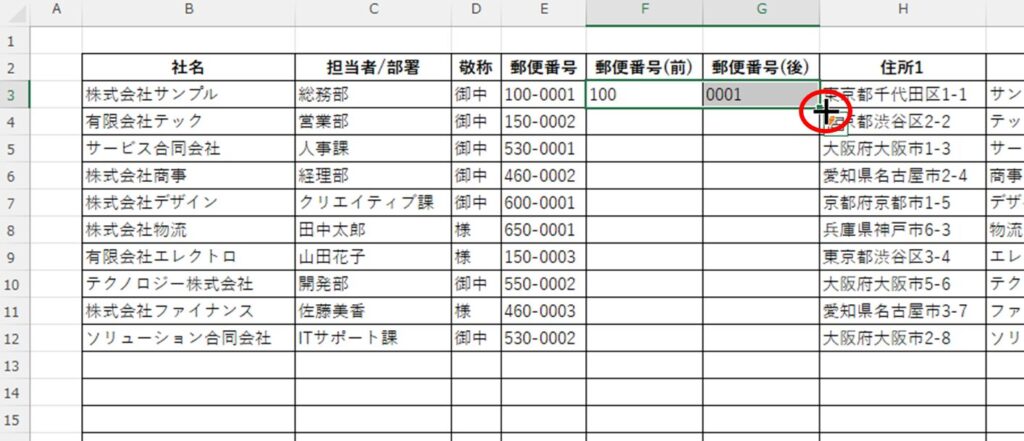
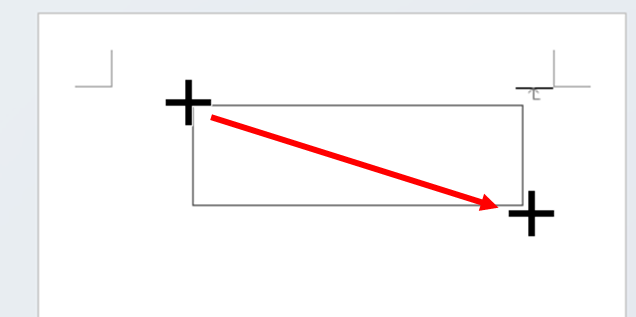
Double-clicking the mouse cursor at the "+" mark as shown above will copy the function all the way down, as shown below.
Once you've made it this far, you'll be able to create a "Save AsI'll leave it at that.
Create an image to print in Word
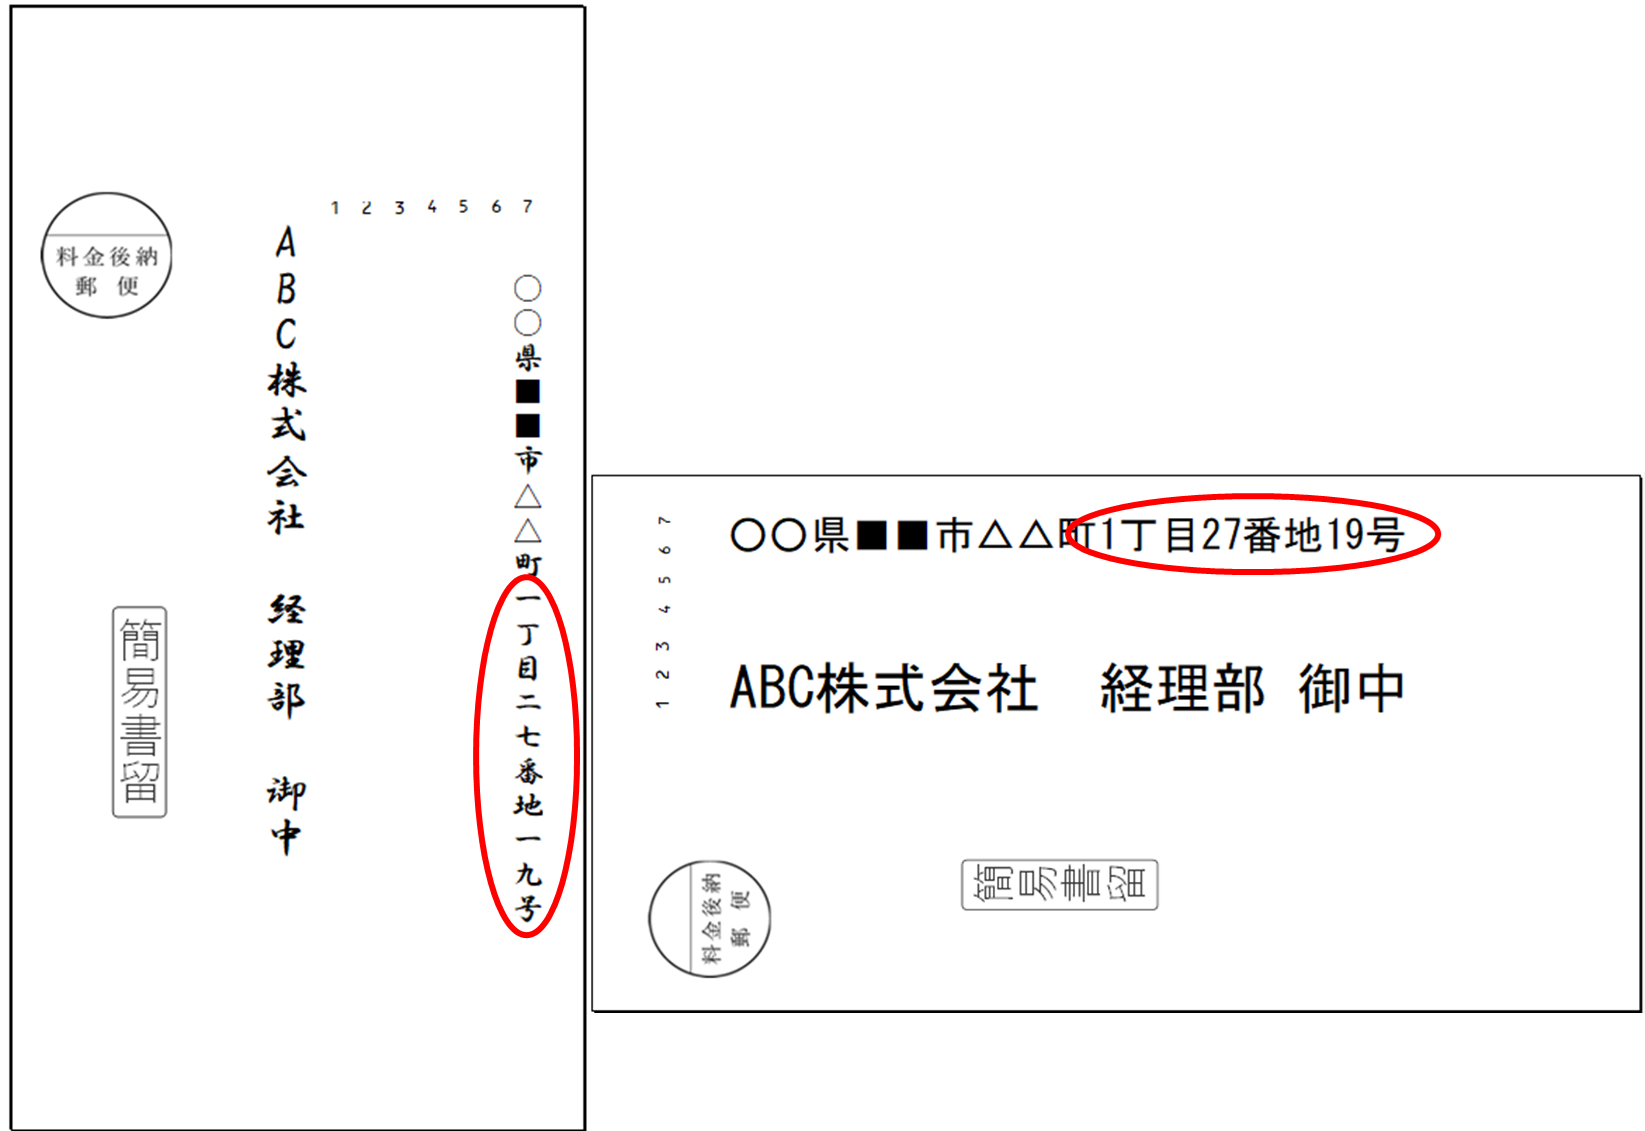
In this issue.vertical writingLet's adjust the layout using the example of printing on a postcard of
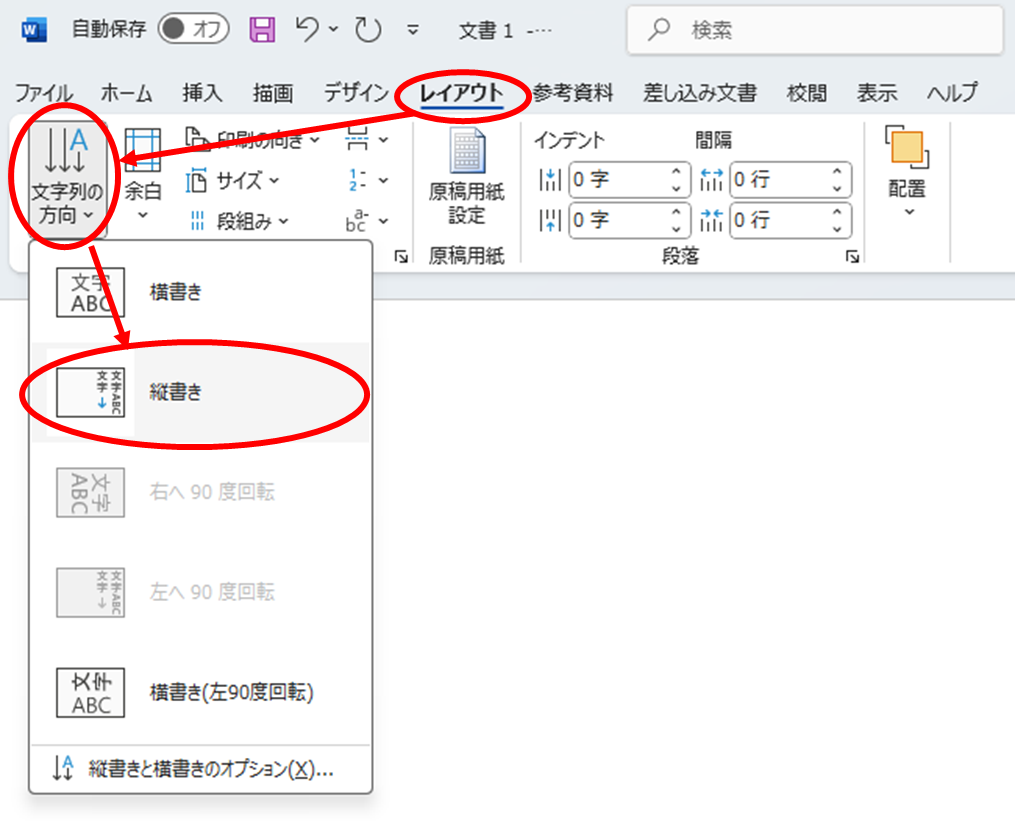
Configure paper settings
On the "Layout" tab, click the "String Direction" button, then clickvertical writingSelect the "□" option.
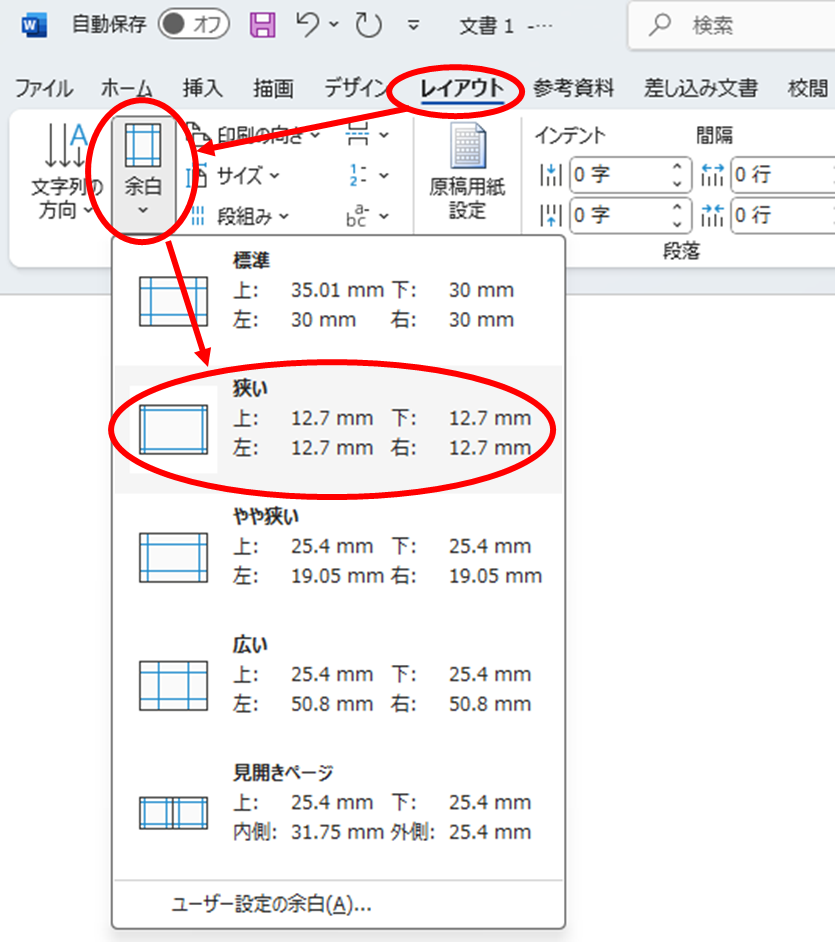
Similarly, from the "Margins" button on the "Layout" tab, click on the "Margins" button and then click on the "Margins" button.narrowSelect the "□" option.
Next, the print direction is set to "(weaving) warpChange to "1.

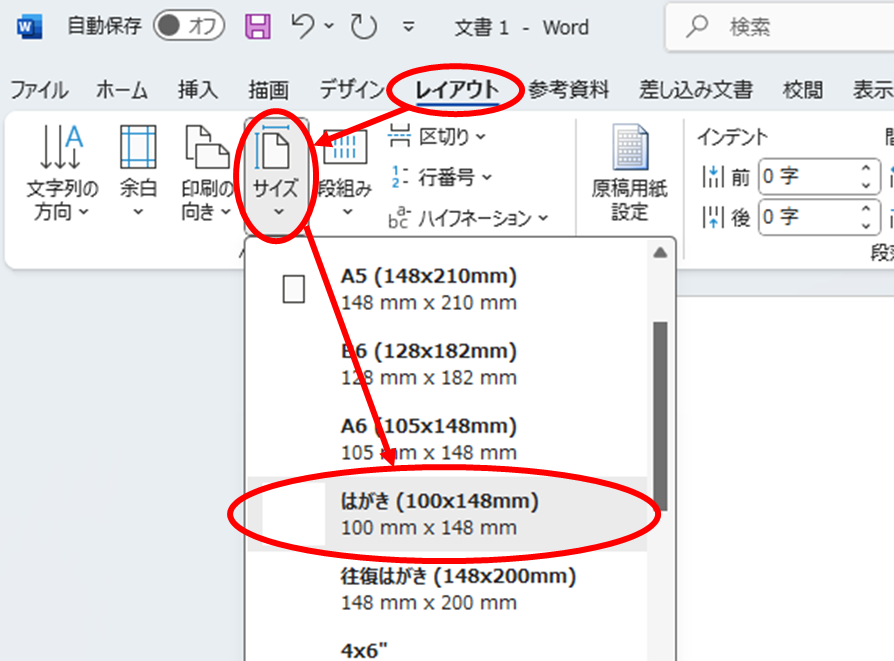
Finally, the paper size is set to "postcardChange to "1. For envelopes, select the target size envelope.
Set up Excel data to be inserted into Word.
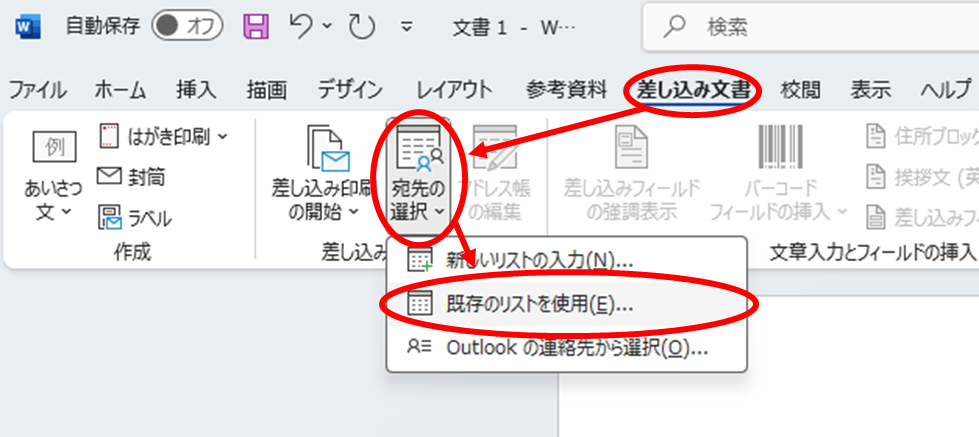
To extract the part that starts withattachmentFrom the "Select Destination" button on the "Destination" tab, click on the "Select Destination" button and then click on the "Select Destination" button.Use existing listSelect the "□" option.
Open the file containing the list of destinations you just created.
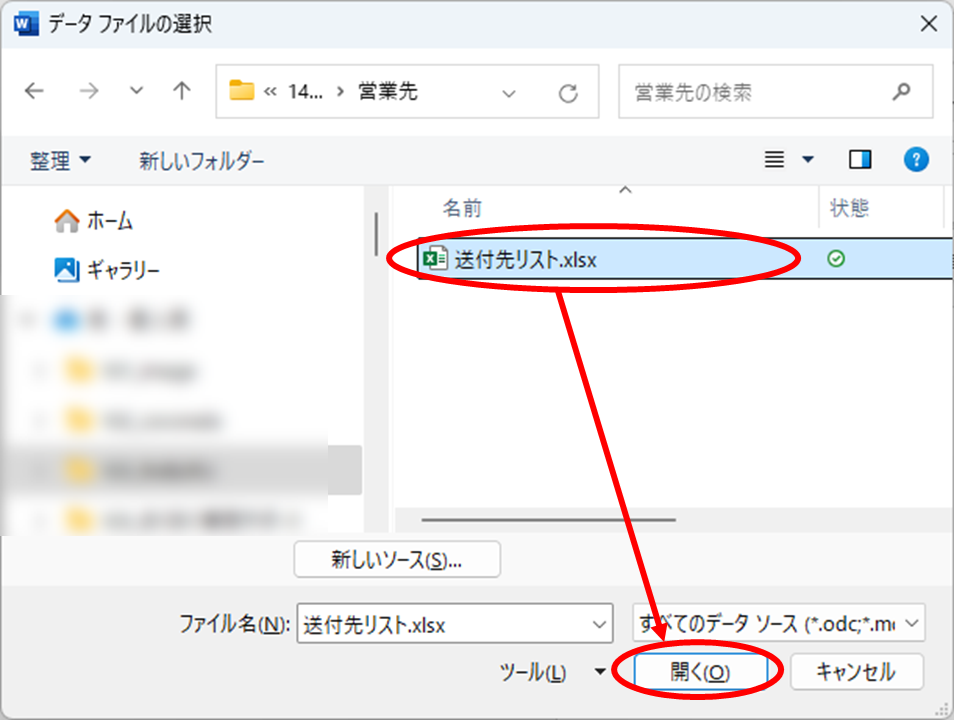
When you get a message like this, select the target sheet and click on "OK.

Reflect Excel data in Word
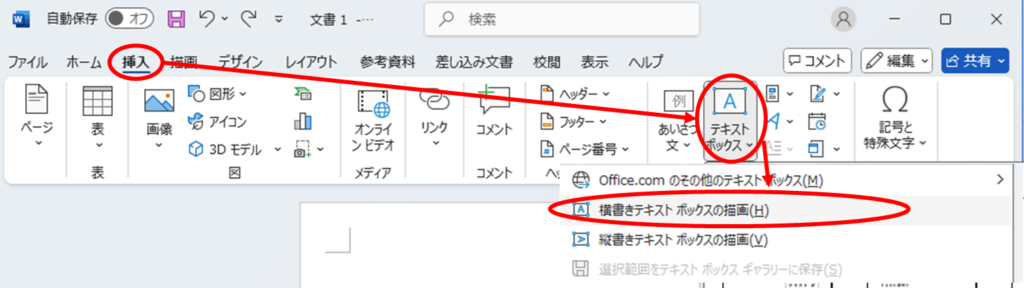
Inserting a zip code into a text box
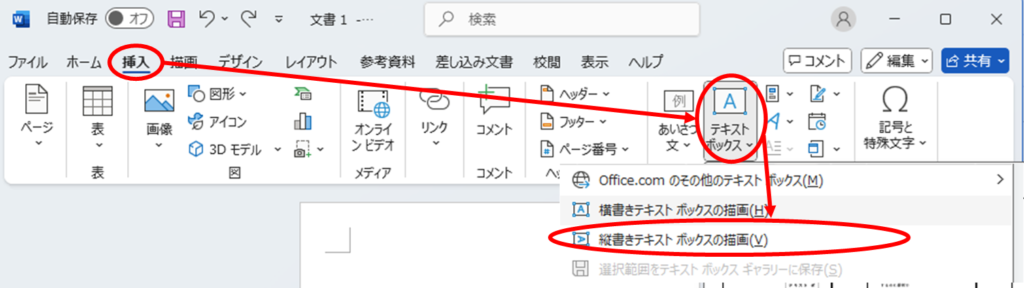
First.postal codeInsert a box for the

Place a text box at the appropriate position.
Next, we will discuss the "A" and "B" in theattachmentFrom the "Insert Insert Field" button on the "Insert Field" tab, click on "Insert Field" and then click on "Insert Field".postal code.
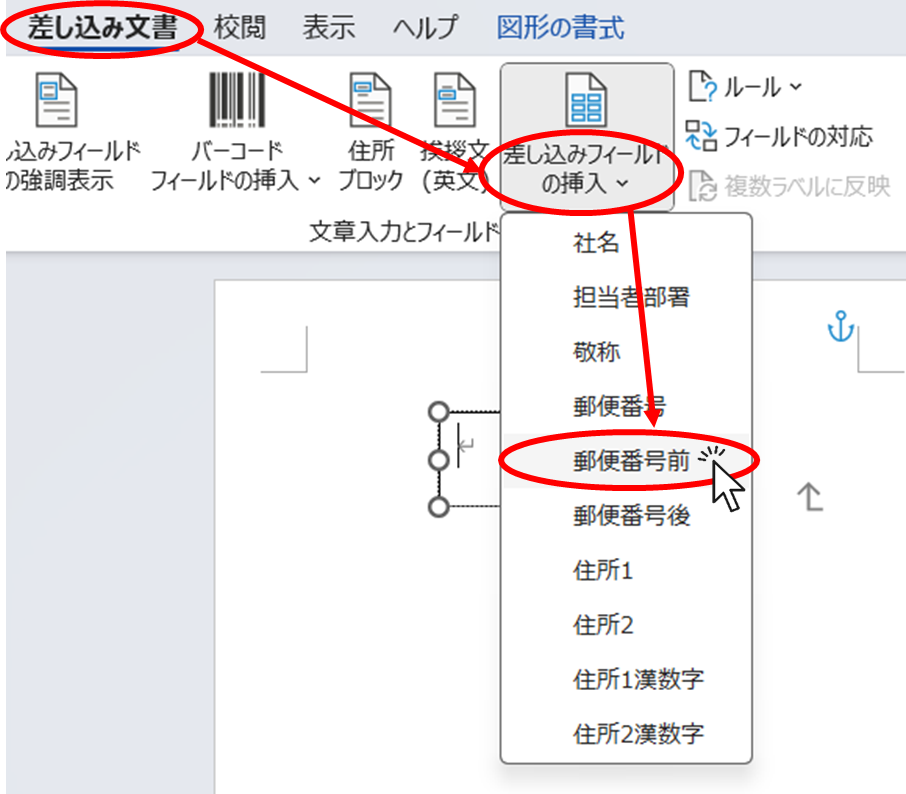
Then the text box will look like this, with "Before Zip CodeThe word "□" has been entered.

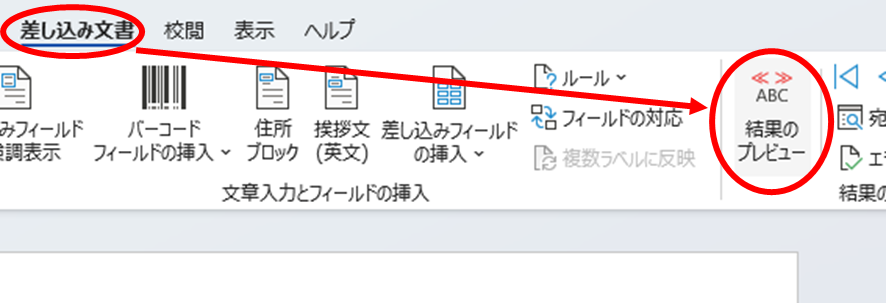
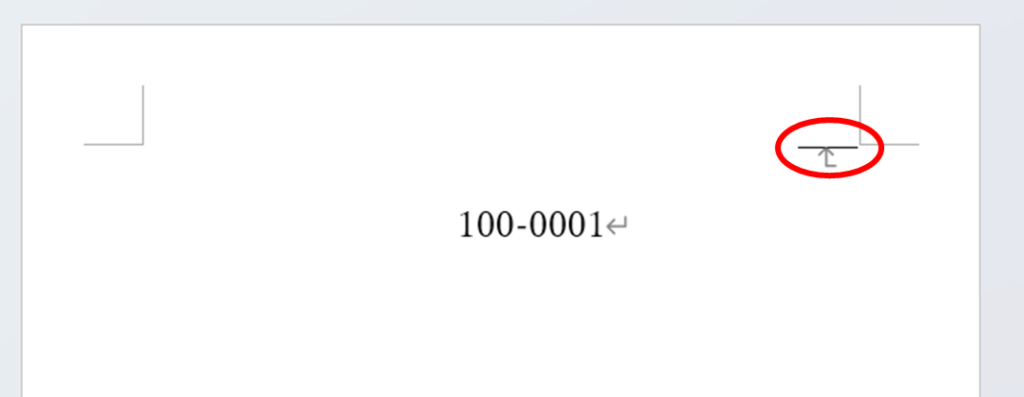
In this state, the "Preview ResultsPress the "+" button.
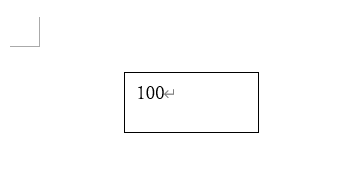
In the text box, the zip code "100is now displayed.
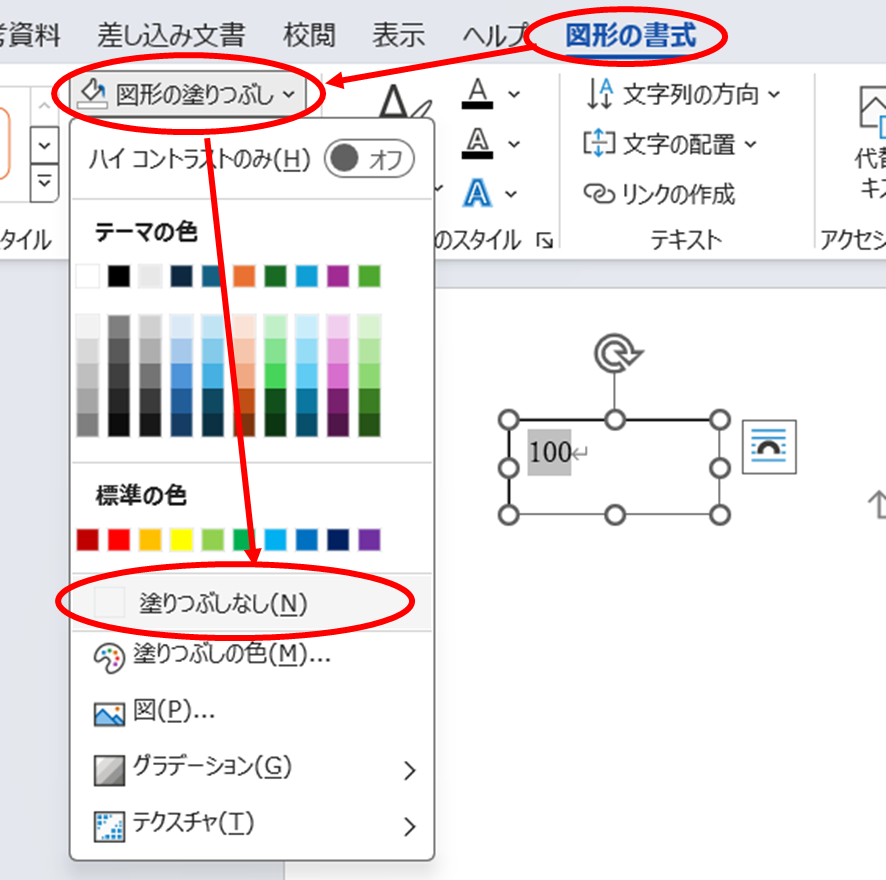
With this text box selected, go to the "Format Shapes" tab and press the "Shape Fill" button, then press theNo FillClick on the "□" button.
Similarly, from "Shape Border" to "No box line.
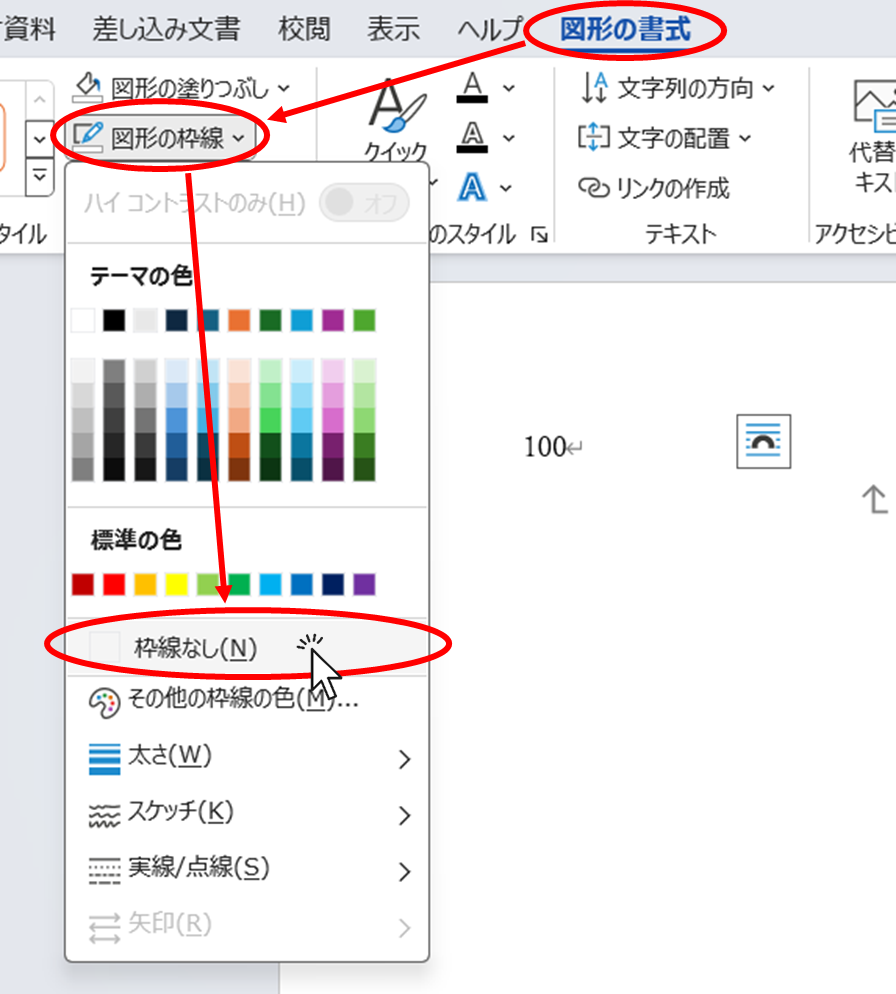
This completes the display settings before the zip code.
Next, display "After Zip Code".
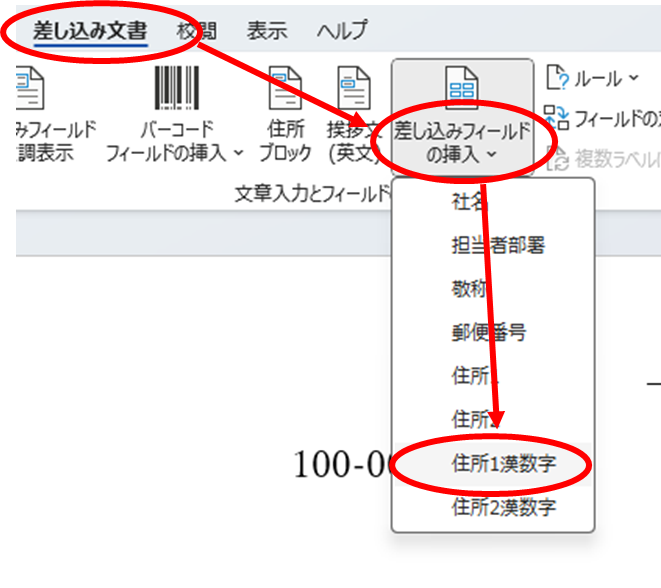
Insert address insert
Make sure the cursor is in the upper left corner of the page.
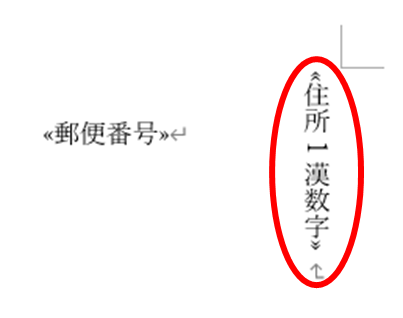
From the "Insert Field" button on the "Insert Document" tab, click on the "Insert Field" button and then click on the "Insert Field" button.Address 1Kanji.
*Because this is the wording of an example listing I created,Different from the list you all created.Please note that there may be cases where
Then, as shown in the figure below, "Address 1KanjiThe item of "The item of the "I" is now included.
Similarly, a new line should be inserted to read "Address 2KanjiPut the ".

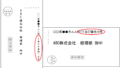
Next, press the Enter key several times until you come to the middle of the paper and then press "name of companyInsert a "+" or "-".
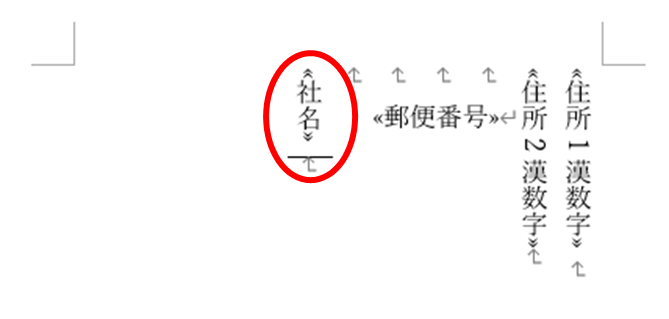
With a similar operation, theDepartment", "Department in charge", "Respectfully yoursInsert the
*At this time, between each itemKeep the "space" in there for a nicer look.will be.

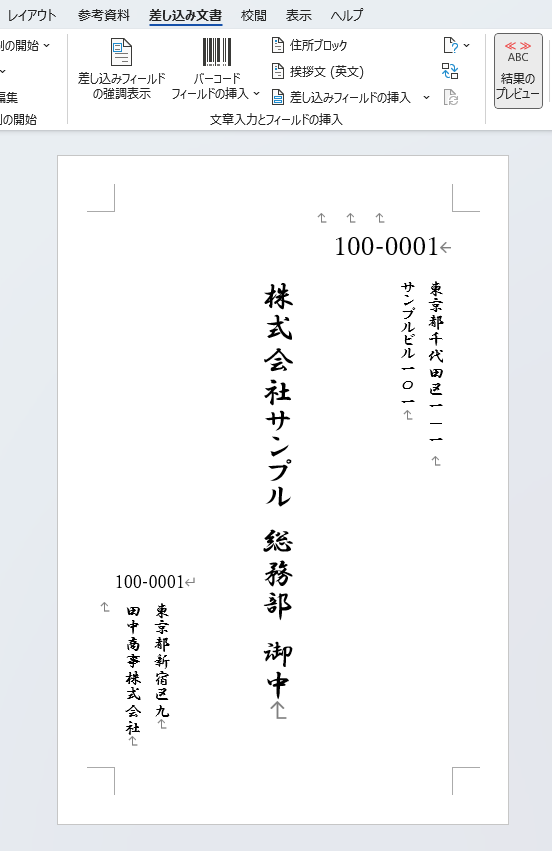
Here, the "Preview ResultsPress "+" to see the actual values as they appear on the display.
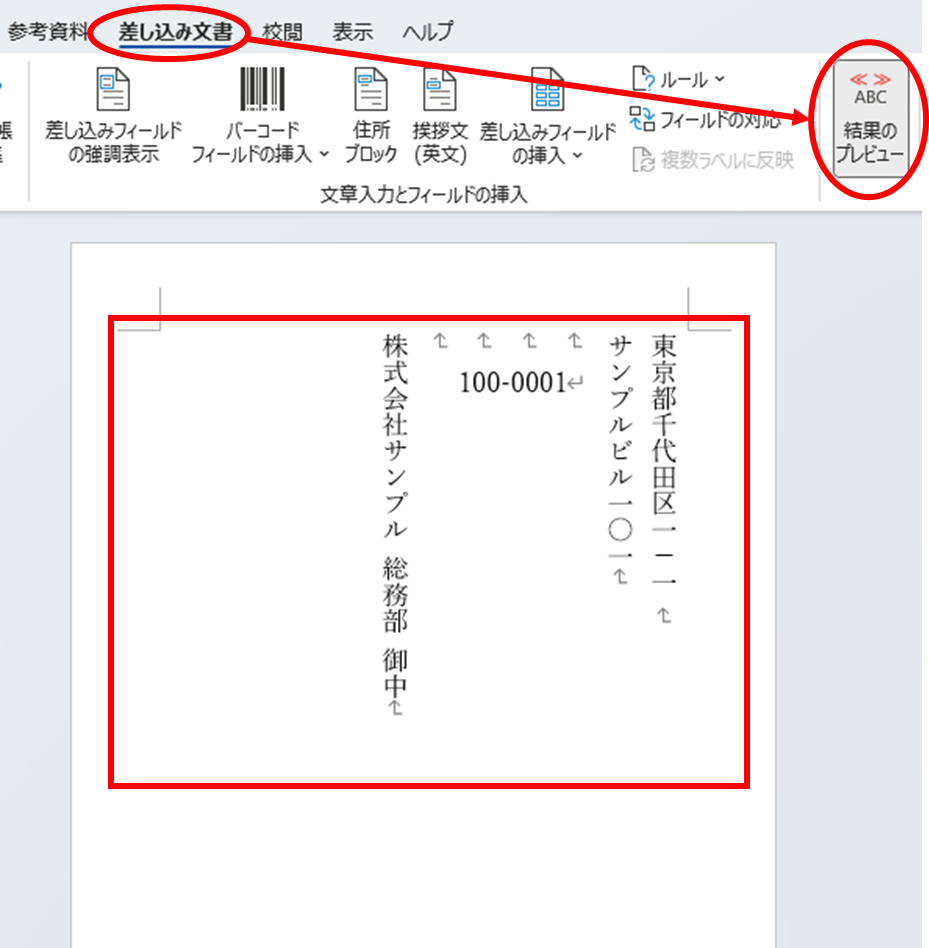
In this state, further fine-tune the layout by adding line breaks, spaces, or changing the font size.
senderPlease insert a text box and manually type in the address, etc. using the same procedure as when you inserted the zip code.
The basic layout is now in place.
Make a test print and adjust the layout.
When you actually print on postcards or envelopes in this state, you may find that they are more misaligned than you expected, or that the font size is too large or, conversely, too small.
after thatActual printingand try it out, and then choose the font size, position, font, etc. to your liking.fine tuningPlease do so.
Continuous printing of all pages in a batch
If there are no problems with the test printout, the data in the list will be printed together in series.
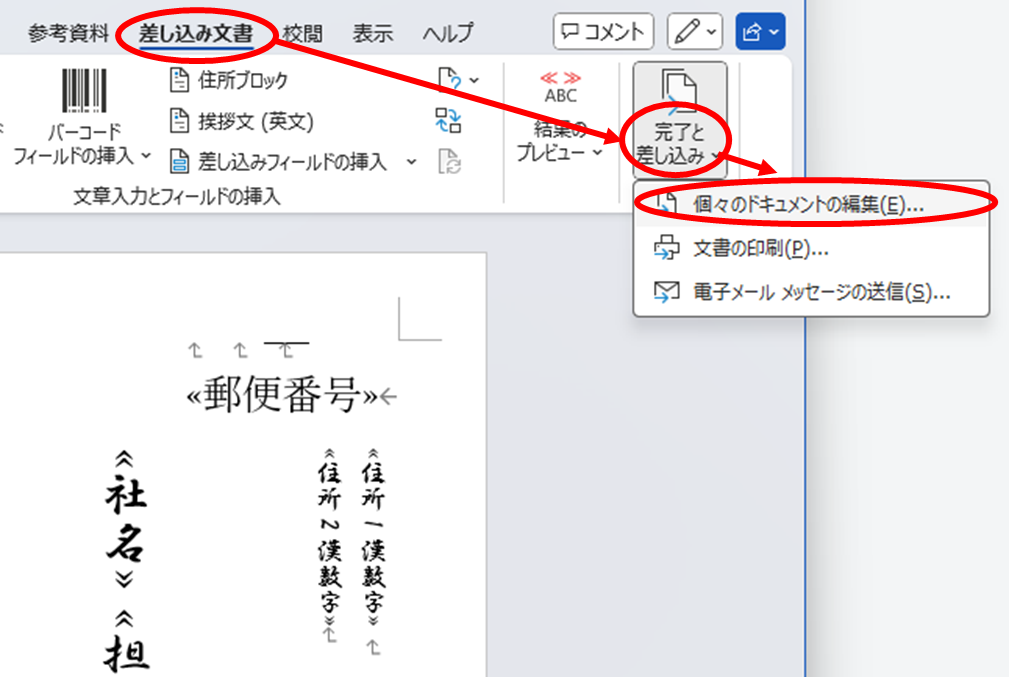
On the "Inserted Documents" tab, click the "Done and Inserted" button, then click "Edit Individual Documents".
If there are no problems, click "OK.
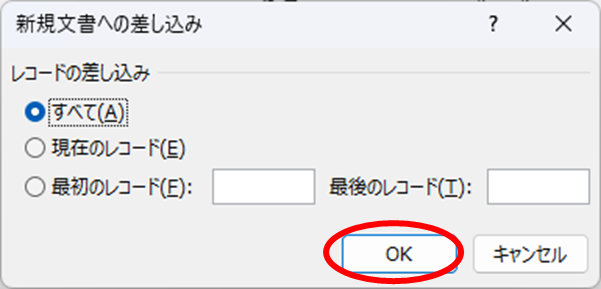
If you want to print a range of records instead of all of them, enter numbers for "first record" and "last record" and click the "OK" button.
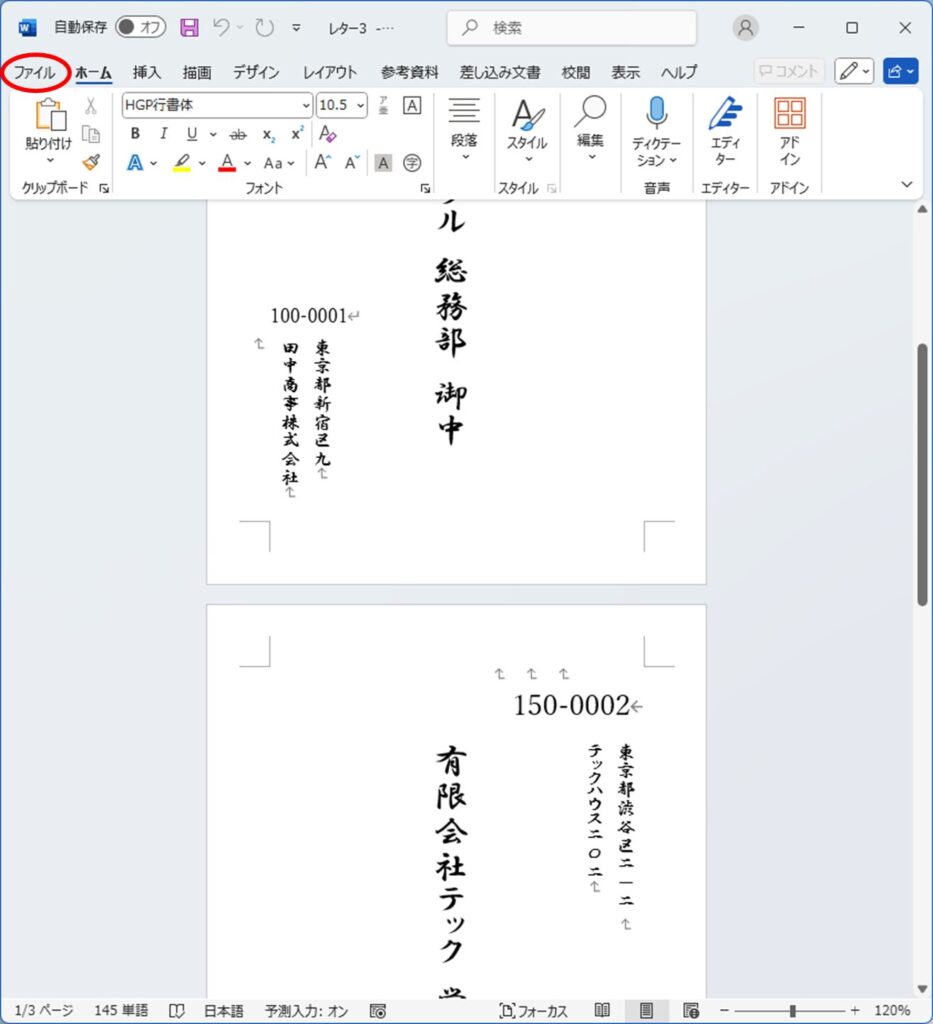
A page of words with values for the specified number of sheets will then be launched.
You can then print this page to print multiple destinations at once. Click on "File" in the upper left corner.
From the menu that appears, click on "Print" and then "Print".

All pages are now printed to the destination.
This method allows you to write printouts in the future without having to learn how to use new software, just by modifying the listings.
We hope we have contributed to the reduction of man-hours for everyone.
We look forward to seeing you again at our own meeting!


Comment