Previous How to display time in 15-minute increments with the TIME functionHow to Round Time to 15-Minute Intervals in Excel (Easy Formula Guide)However, I received a suggestion that it would be easier to use the CEILING and FLOOR functions. I am ashamed to admit that I did not know about these functions until you pointed them out to me, but I looked them up and found that they are indeed useful, so I will now show you how to use these functions to set 15-minute increments.
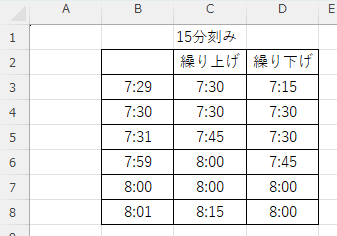
How to use the CEILING function (carry forward)
CEILING(number, reference value)
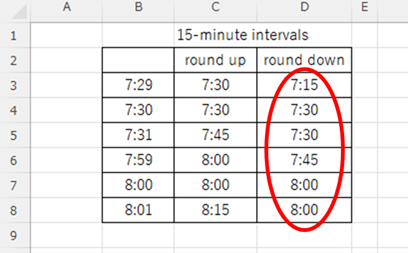
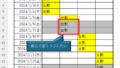
First of all, we must find the "B3The time information entered in the "Time" cell is15Minute by minute.advanceTo display the "C3" cell as shown below, enter the following.
=CEILING(B3,"0:15")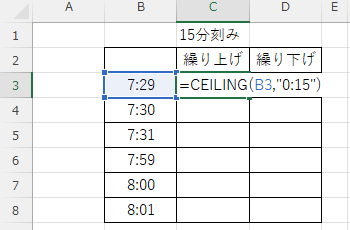
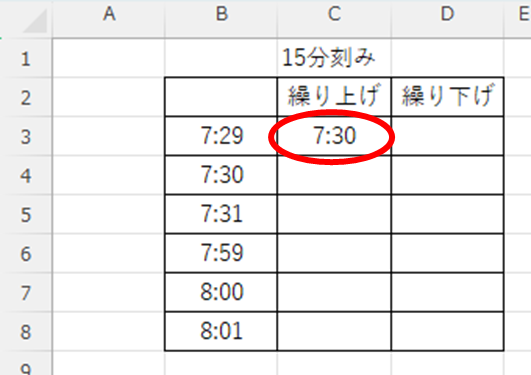
Then, as shown in the figure below, we were able to move up by 15-minute increments.
Then copy this function down to the bottom.
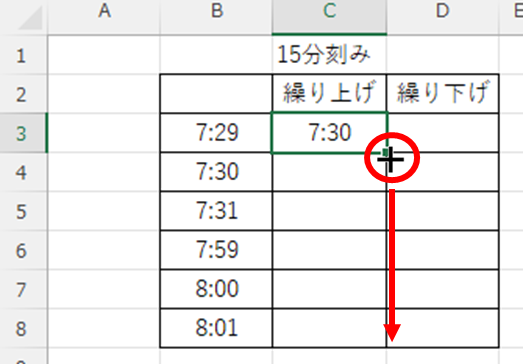
Then, as shown in the figure below, you will see the results moved up in 15-minute increments.
Usage of the FLOOR Function (Delete)
FLOOR(number, standard value)
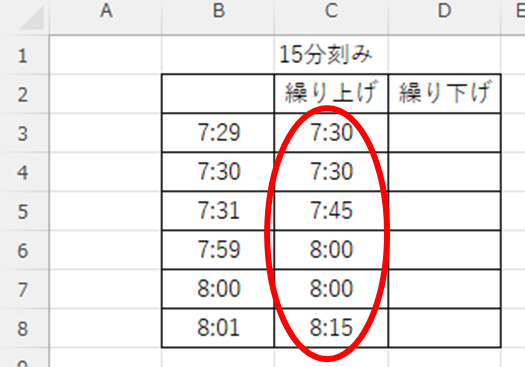
Next, we'll look at the "B3The time information entered in the "Time" cell is15Minute by minute.postponementTo display the "C3" cell as shown below, enter the following.
=FLOOR(B3,"0:15")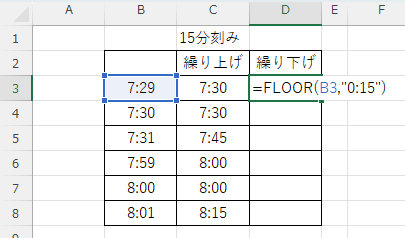
As a result of inputting this function, the 29th minute is moved down to the 15th minute, as shown in the figure below.
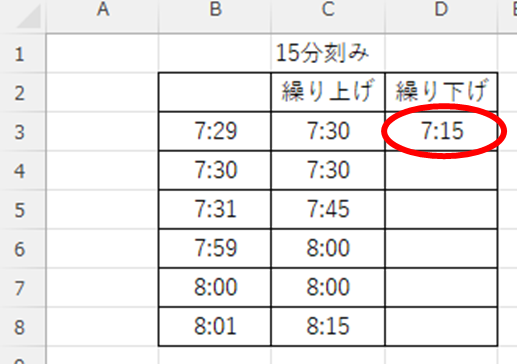
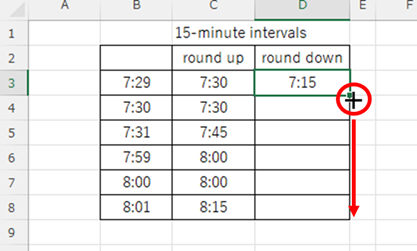
Let's reflect this function to the cells below.
Then you will see the results displayed in 15-minute increments, as shown in the figure below.
Summary
As we have seen, by changing the reference value, the setting method is flexible, including 3-minute, 5-minute, and 10-minute increments.
Please refer to the following section for information on how to combine the TIME function with the ROWNDUP and ROWNDDOWN functions.How to Round Time to 15-Minute Intervals in Excel (Easy Formula Guide)
We would love to hear various opinions on which is easier to understand and use in the comments section.
I hope this article will be helpful to you.


Comment