If the column width is too narrow and the cell contents are not displayed in their entirety, or if the row height is too narrow and the contents are not displayed, visibility will be very poor. This time, we will explain how to easily automatically adjust the row height and column width to the right size.
For how to automatically adjust using a macro (VBA), seeAdjust Row Height and Column Width with Excel VBA.
How to Automatically Adjust Column Width and Row Height in Excel VBA
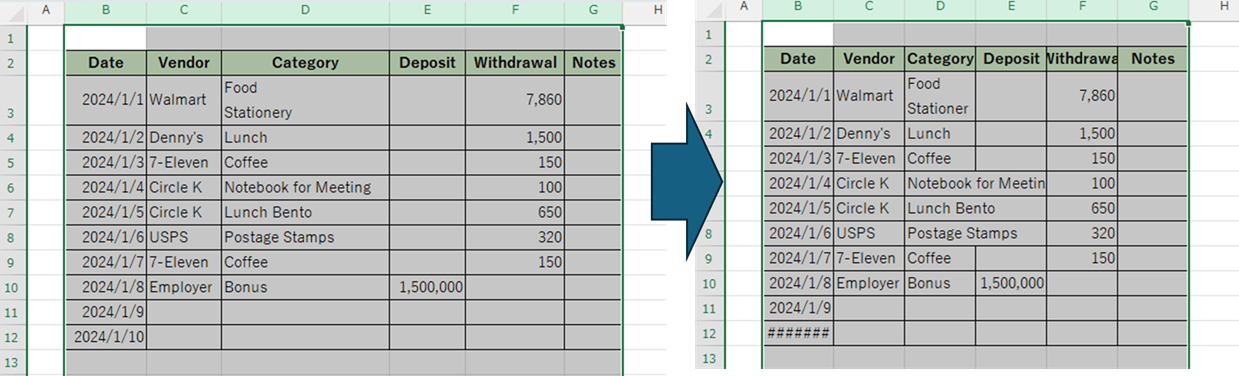
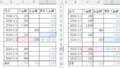
Let's examine a table where improper column widths and row heights affect data readability.
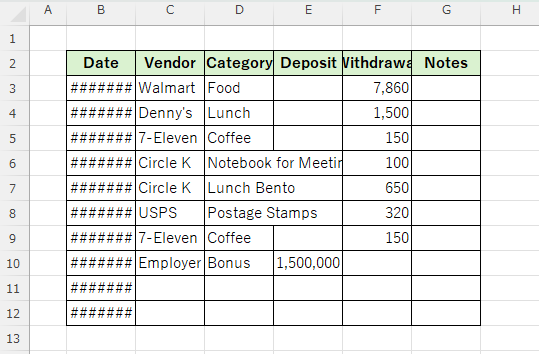
Because the dates in column "B" and the amounts in column "E" are too narrow, they are displayed as "#######" and the dates and amounts cannot be read.
Also, only the front part of column "C" is visible, and the back half is obscured by column "D" and cannot be read. Column "D" does not fit in the text and overlaps with column "E".
Auto-adjust column width
First, let’s adjust the width of columns “B to G” to display the cells that are too narrow to see.
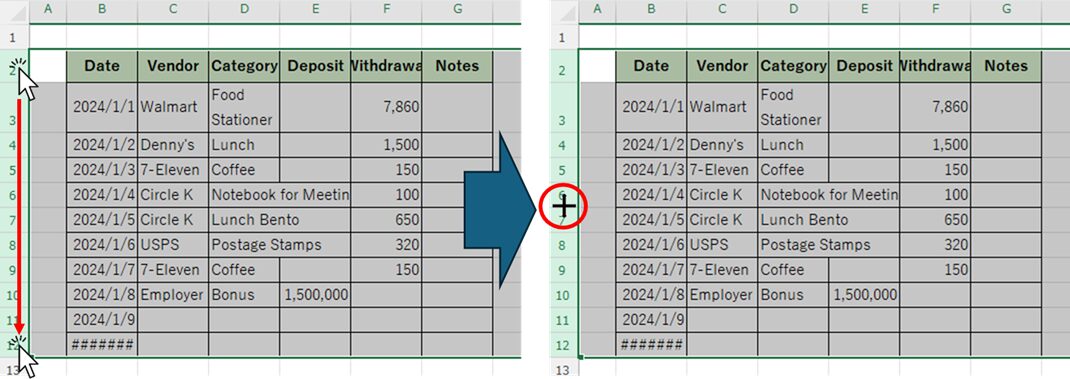
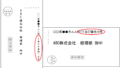
Select columns "B" to "G" and move the mouse cursor anywhere within the selection range near the boundary of the columns. The mouse cursor will change to a cross shape as shown in the red circle.
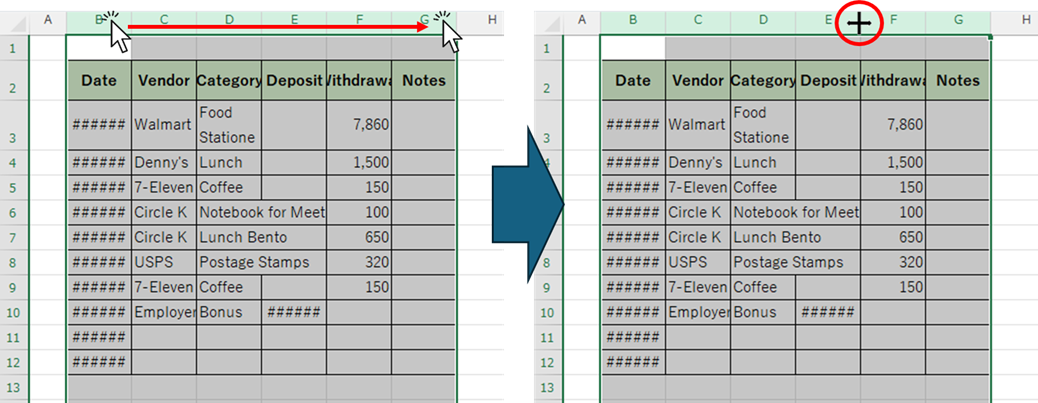
In this state, double-click
Columns "B~E" have been made wider, making the entered data easier to read.
On the other hand, columns "F" and "G" were too wide with wasted space, so they have been adjusted to a more appropriate size.
Auto-adjust row height
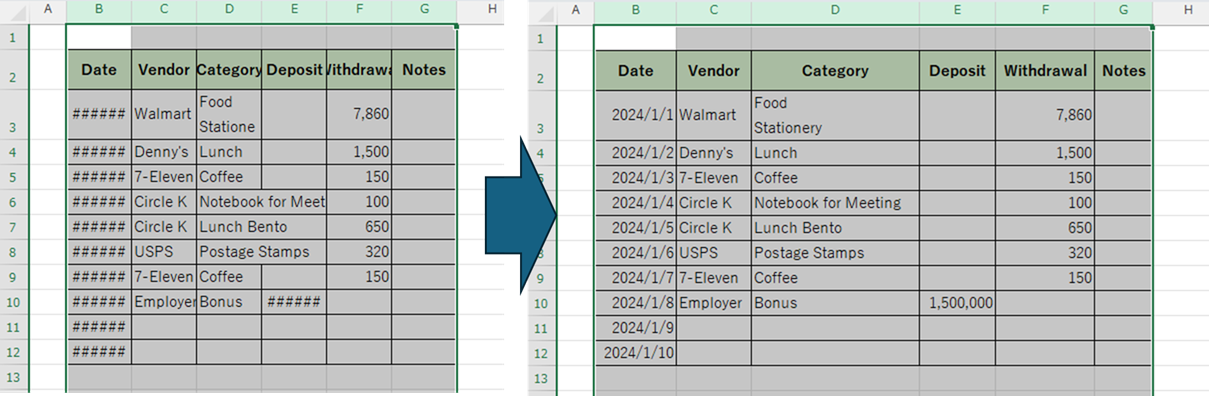
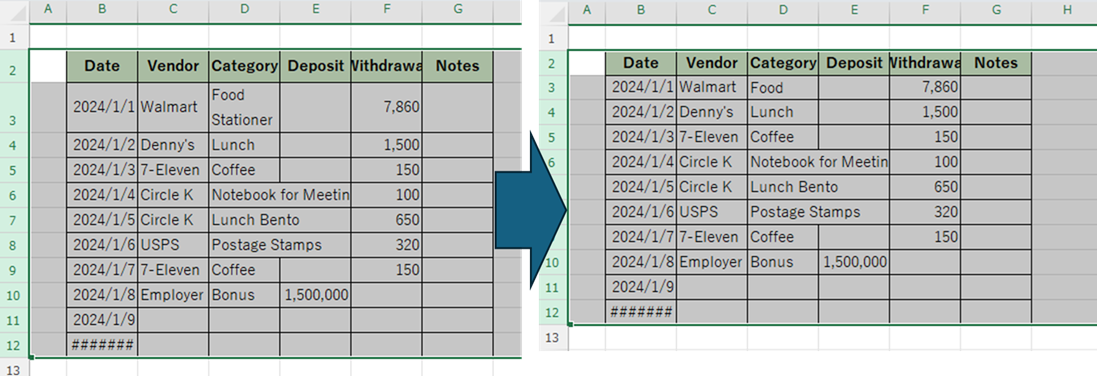
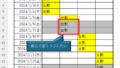
Next, we will adjust the row height of rows 2 to 12.
Select "Line 2" to "Line 12" and move the mouse cursor anywhere within the selection range near the boundary of the lines. The mouse cursor will change to a cross shape as shown in the red circle.
In this state, double-click

The "third row" has become wider. I didn't notice it at first, but the "D3" cell had a line break, and the word "stationery" was completely hidden. This macro automatically adjusted the height to display all the data.
Resize all selections to the same width and height
Change the width of all selected columns to the same size
To make all columns the same width, first select all the columns you want to make the same.
In this case, select columns "B" to "G", and move the mouse cursor anywhere within the selection range near the boundary of the columns. The mouse cursor will change to a cross shape as shown in the red circle.

In this example, if you resize column "D" to your liking,
Columns "B" through "G" are now all the same size.
Change the row height to any size
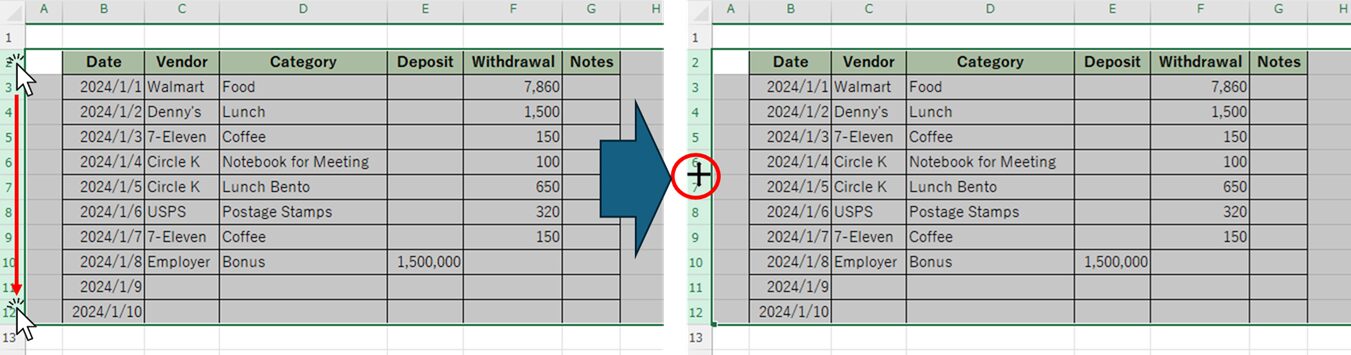
Next, let’s try making the row heights of rows 2 to 12 the same.
Select "Line 2" to "Line 12" and move the mouse cursor anywhere within the selection range near the boundary of the lines. The mouse cursor will change to a cross shape as shown in the red circle.
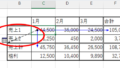
If you change the row height in this state
The second row, including the title row, is now the same height. The third row had two lines because cell D3 was broken down into two lines, but now only one line is displayed.
Summary
This time we explained how to manually adjust them automatically or change them all to the same size.
You can also use macros to automatically adjust the size or change it to any size.Adjust Row Height and Column Width with Excel VBA.


Comment