There are functions to stick images on Excel, fit images into cells, and do many other things with images.

In this article, we will show you two ways to import images into Excel.
Placed on top of cell
Once you save the file in a folder somewhere on the device, you can use this method.
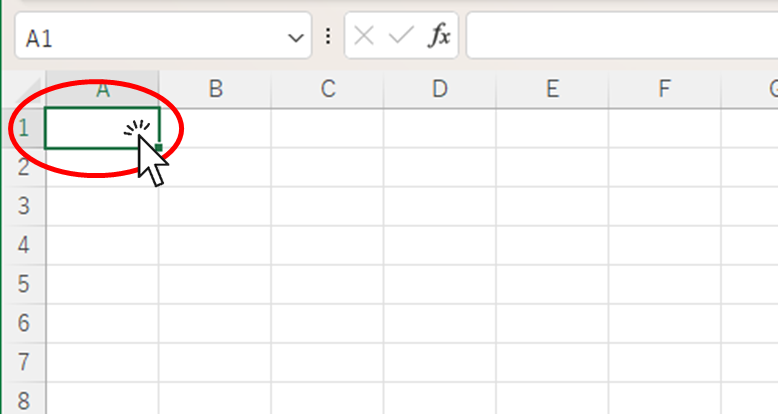
First, select the cells in the vicinity where you want to insert the image. In this case, select the "A1" cell.
Since the image is inserted into the selected cell, not the currently visible screen, if you insert an image while a cell outside the screen is selected, you may not know where the image is inserted on the screen, so be sure to select a cell near where you want to insert the image.
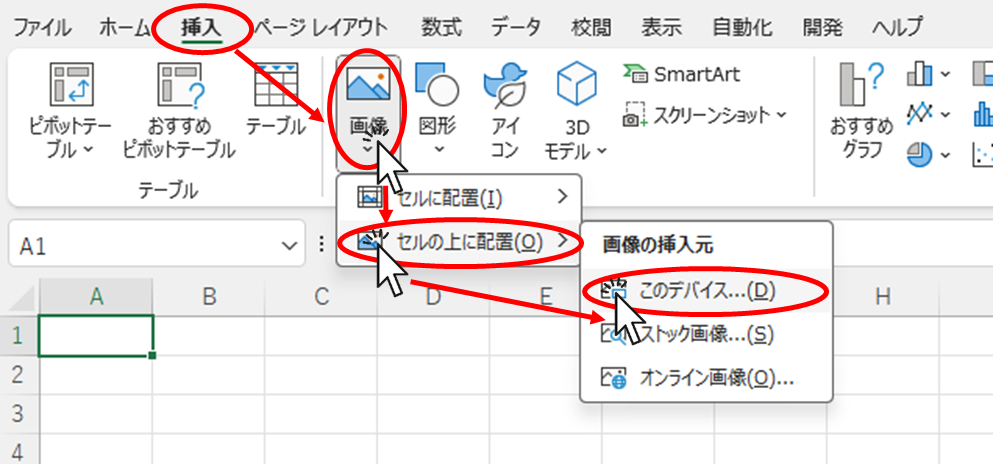
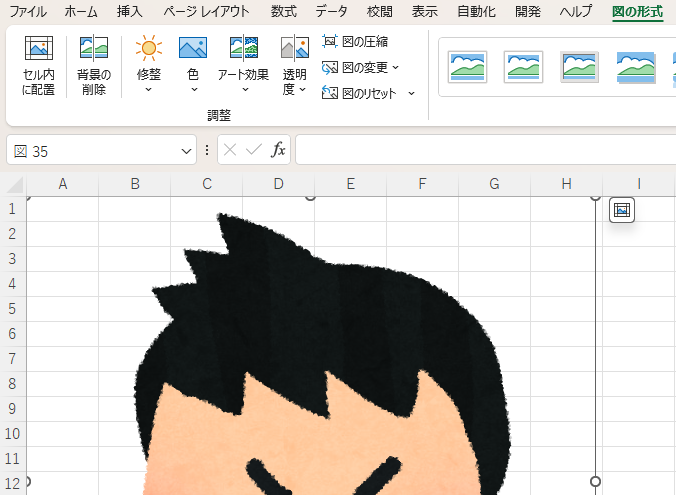
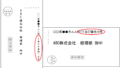
From the "Insert" tab, click on the "Image" button, then "Place Over Cell", then "This Device".
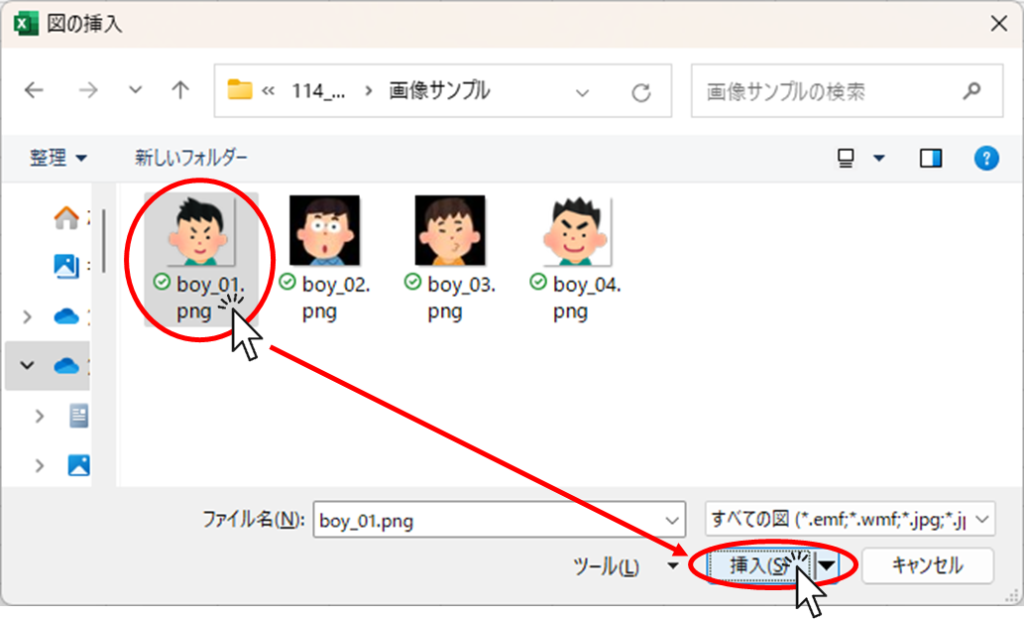
Open the folder where the images are stored, select the image you wish to insert, and click the "Insert" button.
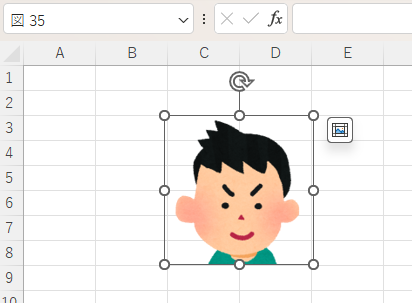
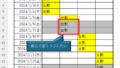
Then the image could be attached like this.
All that remains is to adjust the size and fine-tune the location of the placement.
Text can also be superimposed using text boxes, etc.

Placed in cell
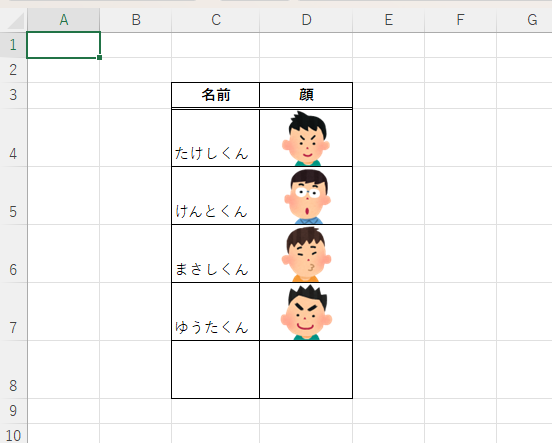
If you want to fit a portrait photo into such a table, "Place in Cell" is useful.
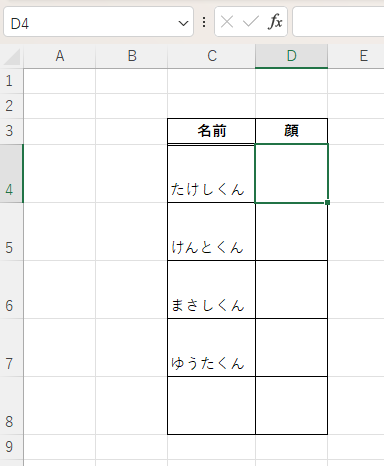
First, select the cell into which you want to insert the image.
From the "Insert" tab, click on the "Image" button, then "Place in Cell", then "This Device".
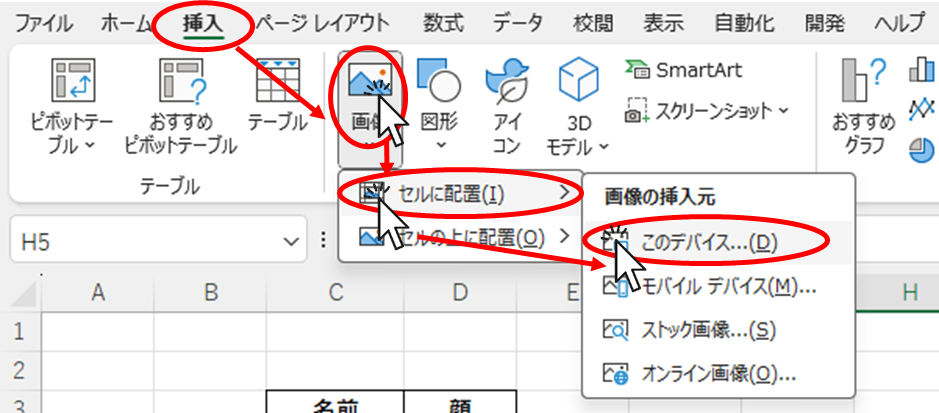
Open the folder where the images are stored, select the image you wish to insert, and click the "Insert" button.

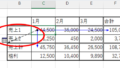
Then the image could be inserted into the cell like this.
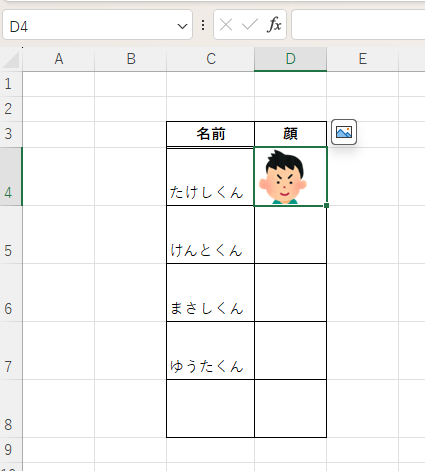
Similarly, I fitted images for the other three and widened the column widths slightly.

Since it has moved to the left, let's "center" it as we did with the text.
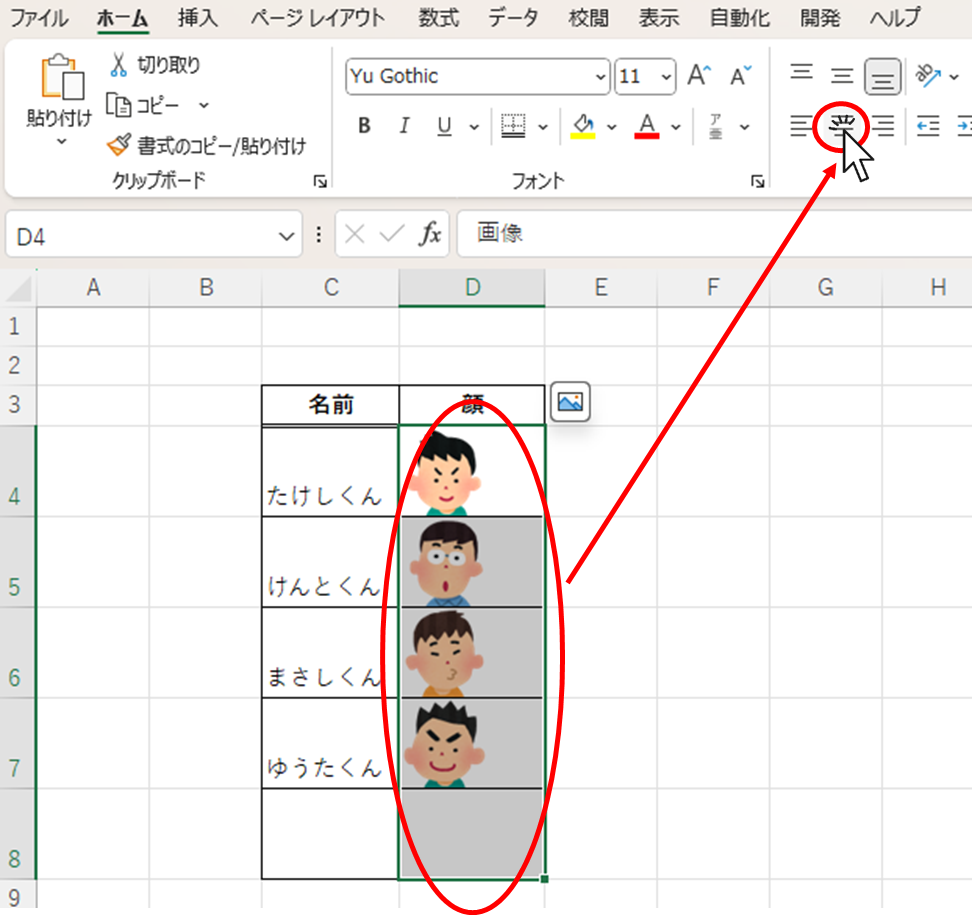
Select the cell containing the image and click "Center" on the "Home" tab.

The image is now centered as shown here. If you want to put an image in a table like this, "Align to Cell" is convenient because you can adjust the position of the image in the same way as the text by selecting "Align to Cell.


Comment